Over 2 million Starlink users figured out how to mount Starlink to get an unobstructed view of the sky and get a clearer signal.
Although the Starlink kit comes with a default tripod mount, there are better mounts that will give your dish more clearance. Try these mounts for different results:
Roof mount – Minimal roof invasion or damage.
J-mount – Versatility
Flashing mount – For roof shingles
Pivot Mount – For Starlink RV
Tower mount – Best in places with heavy obstruction
This guide provides the lowdown on residential users’ most effective mounting options.
What Is The Best Way To Mount Starlink?
Starlink operates best with a clear view of the sky. Therefore, your mounting should ensure the following.
- The dish has a flexible angle to move.
- You can get an unobstructed view at any time.
- You can reach the dish in case you need to make changes.
- The mount and dish are safe and secure against harsh weather and damage.
The roof mount is one of the best ways to mount Starlink. You have two options for mounting your Starlink on the roof.
Here’s how to install Starlink on the roof using a roof mount and a flashing mount.
How To Mount Starlink Dish On A Roof.

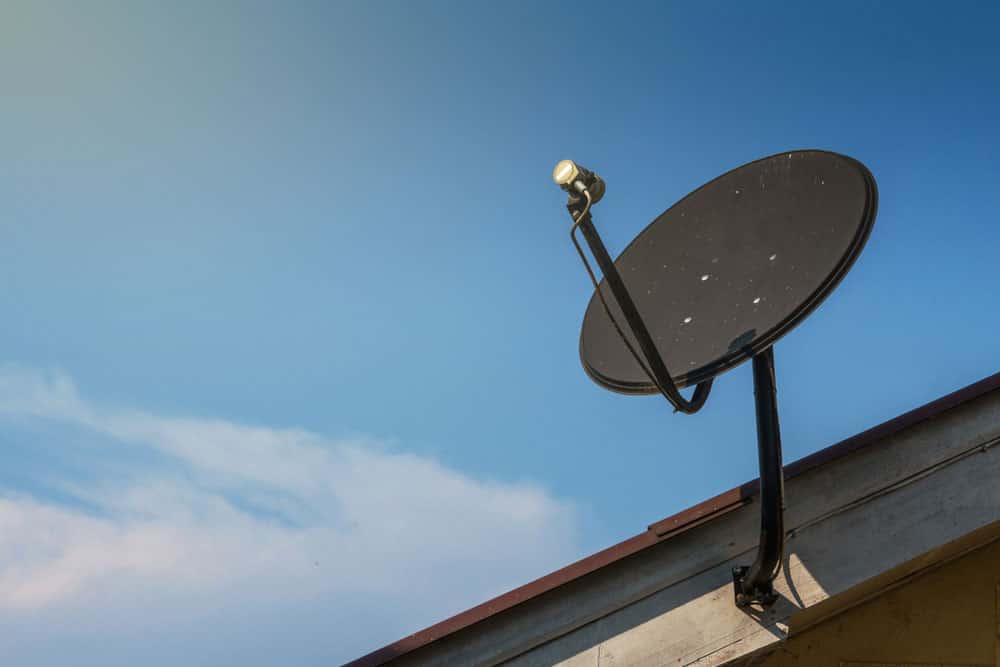
Satellite installed on a roof.
You can mount the Starlink dish using the ridgeline on a sloped or flat roof. The aim of using a ridgeline mount is to avoid penetrating the roof.
Assess where to install the mount.
The location of your mount needs to be somewhere that allows easy cable routing into the house. We recommend picking a spot on the roof near any entry point, like a window.
Unplug the Starlink dish.
Switch off the power and unplug the Starlink dish cable from the router.
Carry up your mount.
The ridgemount isn’t that heavy. However, ensure you have secured the roof with roof jacks for your feet. Roof jacks give you somewhere to firmly place your feet on a sloping roof.
Loosen the mount’s arm.
The non-penetrating roof mount has a center arm. Turn the knob to loosen the arms.
Position the mount.
Sit the mount such that each side of the mount sits flush on the roof while the center rests on the ridgeline’s peak.
Tighten the mount.
Tighten the center arm controlling knob so your mount doesn’t extend or contract by accident.
Secure the mount.
The ridgeline mount comes with ballast bags to keep the mount steady. Carry them up the roof and place two on each side of the mount. Ensure they cover all four corners. They are heavy enough to stay put against the wind. Add an optional DIY sandbag/weight to hold out against heavier winds.
How to Run Starlink Cable Into The House
Route your cable.
Using the shortest path to an exit point closest to the mount, place the cable against support structures where you can place cabling pins. Your cable will pass by the house’s outer wall.
Note: You are avoiding drilling any holes on the roof. However, you can drill a hole in the home’s wall siding.
Ensure the dish connector stays near the mounting site while the router plan stays near the house.
Create a clear path in the house.
Create the shortest path between the Starlink router inside and the dish mount outside. Keep the wall undamaged.
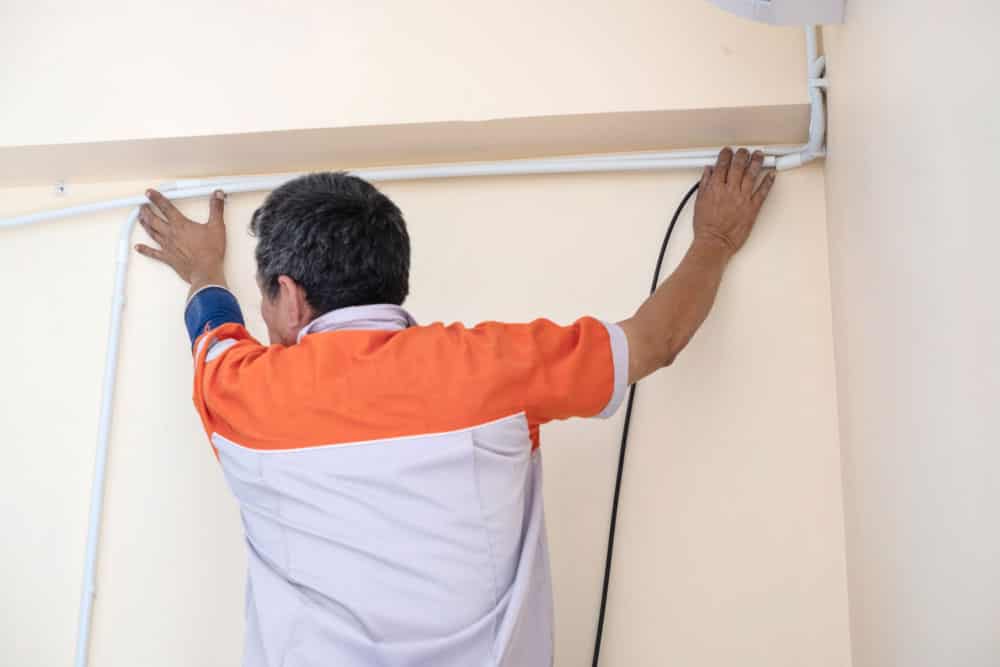
A technician laying cable in the house
Pin the cable.
Cable clips provide neat work, and long cables. Ensure your cable bends in gentle curves only.
Also, it might help if you route the cable through areas in the home with minimal movement. Low or high wall sections ensure your walls stay need clear of any wire eye sores.
Place the Starlink dish.
Carry your Starlink dish in its carrier bag to avoid damaging it. At this point, you should have run part of the cable up the mount’s length. Slide the dish onto the mount’s pole. You’ll know it’s a snug fit when you hear a click.
Ensure the dish faces upwards at a slight angle and there’s no shaky movement when touching the mount slightly.
The final step is in your house when you reconnect Starlink to the router and run a speed test.
However, you can install the Starlink satellite on a roof with shingles. The best mount for this procedure is the flashing mount.
Installing Starlink On A Shingle Roof With A Flashing Mount
- Using a stud finder, mark a spot on the roof where you can find a stud.
- Drill a hole through the roof where you can pass the Starlink dish cable. We recommend walking away from the stud but near the flashing mount installation point.
- Place the flashing mount on the roof near the cable hole. Trace the outer margins of the cover with a visible marker.
- Cut the roof shingle so you can insert the flat end of the flashing mount into the shingle flap.
- Slide the mount into the flap and ensure it’s secure.
- With the flashing mount in place, apply a liberal amount of roof cement along the edges of the shingles to seal the cutout.
You must drill a J-mount or pivot mount into the flashing mount base to mount the Starlink dish.
How To Mount A Starlink Dish On A Wall
A J-Mount on a wall siding
Most mounts come with a standard 1.5” diameter mast. However, you can buy an original Starlink pole adapter that fits the dish without ruining the clip or the cable.
A J-mount is one of the most versatile mounts on the official Starlink site. Here are its standout qualities.
- You can fit it on the house’s siding.
- You can install it on a roof with the flashing mount.
- You can mount the Starlink dish on stone/brick surfaces like chimneys.
- You can customize it for RV installation.
Follow this step-by-step guide to install a Starlink dish without damaging the roof.
- Place the J-mount’s base on a flat wall.
- Mark the position of the base’s holes with chalk or marker.
- Drill holes where you put markings.
- Place the J-mount, aligning the holes on the base with the holes on the surface.
Pick the right lag screws. (wood lag screws for wood surfaces and metal screws for brick and stone) - Drill screws through the holes and into the walls. We recommend covering the screws in thread tape to add more traction.
- Ensure the J-mount is secure before mounting the dish on the mount.
Placing the Starlink dish on a Mount
- Assuming you have unplugged the dish from the router, carry the dish to the J-mount.
- Slide the dish mast into the J-mount’s pole. Wind the cable a few times to leave space for any adjustments.
- Ensure the cable mast doesn’t press down on the mount. It might damage the cable.
- Secure the mount. Use U-bolts, universal mount adapters, or drilling bolts into the dish mast through the mount.
- If you prefer to leave the Starlink mast undamaged – to prevent voiding the warranty – you can drill holes into the J-mount mast and make sure the dishy’s spring tabs click into the holes.
Which Direction Should Starlink Face?
The Starlink dish is self-aligning. However, ensure it faces the north if you are in the Northern Hemisphere.
(For context, The U.S. is in the Nothern Hemisphere)
Since the dish has no default direction, use the app to ensure its first direction(Towards the North) has zero or minimal obstructions.
Afterward, Starlink will automatically align itself to the best position.
You don’t need to self-adjust Starlink in any direction. The dish already has a vertical angling. Ensure the motors stay undamaged to get the best direction and angle every time.
Conclusion
Sure, Starlink comes with a default starter tripod stand. However, it would be best if you had a mount to get you clear satellite signals.
Starlink has practical options for mounts. You might need a third-party mount, such as a tree or tower mount in heavily wooded areas.
We recommend you search for in-depth mount guides here.